Tag Archives: chocolate

Easy Nutella Cookies Are Easier Than You Think

Standard

Easy Nutella CookiesIt’s time for an intervention.

That’s what I’ve been told recently, at least. I bake so much that my hands constantly smell like butter. I have a cupcake carrier large enough to hold a medium-sized animal (it was a gift, at least). When I go to the grocery store, I’m constantly stocking up on brown sugar and dark chocolate just in case inspiration strikes. And I Instagram. Like, a lot. So much that my friends tell me I either need to open a bakery soon or slow down before my apartment turns into a real life Candy Land. While I wouldn’t mind having some Gumdrop Mountains in my kitchen, I do like to have an actual life in my spare time.

So, I found these cookies. I had to bake something for a Bachelor viewing party (don’t judge), and I didn’t have much time. Sean needed me. While we all know how much I love me some late-night baking, sometimes I have other things to do. Like being the editor for this awesome site called Chicago Foodies and posting some of my ridiculous original recipes there. If you don’t subscribe to our updates, we probably aren’t friends.

Anyways, I came across this Nutella cookie recipe and figured it would be perfect for a last-minute dessert. It only has five ingredients. What?! No baking soda, or spices, or even butter. Cookies without butter?! It’s madness. But somehow, it works. I hate to admit it, but this Ambitious Kitchen chick is really genius. She has some other cookies that sound okay too, like Nutella Stuffed Browned Butter Chocolate Chip Cookies with Sea Salt and Browned Butter Snickerdoodle Cookies. Browning butter makes everything taste amazing in case you didn’t know this already.

Make these cookies. Follow my one ridiculous sounding rule. Do not eat them straight out of the oven. This isn’t one of those lies your mom told you when you were little to prevent you from eating raw cookie dough. This is real. The cookies have to set and will completely fall apart if you don’t allow them to very thoroughly cool. Their texture is one of the best things about them, so don’t compromise it.

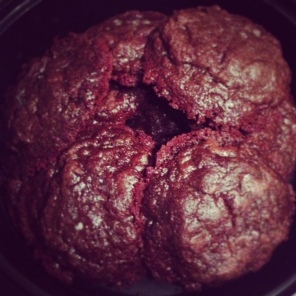
Easy Salted Brownie Nutella Cookies
Recipe from Ambitious Kitchen

Makes 1 dozen cookies

  • 1 cup Nutella
  • 2 tbsp light brown sugar
  • 1 egg
  • 1/2 cup + tbsp all-purpose flour
  • Sea salt
  • THAT’s IT!!!

Combine all ingredients with your mixer (omit the salt). Put your dough in the freezer for 10 minutes. Meanwhile, preheat your oven to 350 degrees F. Remove dough from freezer, and roll into 12 evenly sized balls. The mixture will be very crumbly, not unlike sand. It doesn’t look like cookie dough or anything similarly delicious, but it will be okay, trust me. Space them evenly on two cookie sheets, and press in a pinch of sea salt to top of each cookie. Bake for 8-10 minutes, or until the middle looks set.

The sides of the cookies might look a little thinned or burnt. You can fix that with a spatula as soon as you take the cookies out of the oven. Allow to cool thoroughly before removing from the cookie sheet. Refrigerate and serve cold or at room temperature.

These cookies don’t have a true Nutella flavor, so if that’s what you’re looking for you might want to just grab a spoon and go to town on the jar instead. They’re almost like brownie cookies. The salt is out of this world, and it makes these cookies incredibly addictive.

Eat one of these and try to stop. Then you might be the one who needs an intervention.

Peanut Butter. Fudge. Pretzel. Brownies.

Standard

The best pairs in life are unexpected. Mac ‘n cheese on pizza. Tequila in beer. Justin Timberlake and The Lonely Island. The best of them all is the perfect trifecta: peanut butter, pretzels and brownies.

It was Erica’s birthday and bar was set high. I didn’t want to do something like the expected cupcakes or cake…but what’s better than cupcakes? I think I found it.

Peanut Butter Fudge Pretzel Brownies
Recipe from How Sweet Eats

  • 1 3/4 cups crushed pretzels
  • 6 tbsp butter, melted
  • 1 stick butter, softened
  • 1 1/2 cups sugar
  • 2 eggs
  • 2 tsp. vanilla
  • 1 1/4 cups all-purpose flour
  • 1/4 tsp salt
  • 3 tbsp cocoa powder
  • 2/3 cups chocolate chips (optional)
  • 1 1/2 cups creamy peanut butter
  • 1/3 cup powdered sugar
  1. Mix together melted butter and pretzel crumbs – you’ll want to create the crumbs with a food processor or by crushing them with a mallet.
  2. Preheat oven to 350 degrees F. Spray a square 8×8 baking pan and press pretzel crust into the bottom of the pan.
  3. In a large bowl, beat sugar and butter with an electric mixer until slightly fluffy. Slowly add eggs and then vanilla.
  4. Keeping the mixer on medium, add in cocoa, flour and salt. Mix for a few minutes until just combined.
  5. Mix in chocolate chips by hand in you’re using them. Then spread it evenly into your pan.
  6. Bake for about 25-30 minutes. When you have just a couple minutes left, melt the peanut butter.
  7. Stir in your powdered sugar and mix until there are no lumps.
  8. Remove brownies from the oven. Pour the peanut butter mixture over the top.
  9. Allow them to cool and then refrigerate for a few hours before cutting and serving.
I ate these brownies for breakfast, and I don’t regret it one bit. They were RIDICULOUS. Sweet, salty, chocolatey and peanut buttery. These brownies are so m.o.i.s.t and fudgey. Make these yourself because they really were not that hard to bake (even if you don’t have any special redheaded baking powers like I do).
I’m pretty sure Erica had a good birthday. Especially since a friend sent her these…
It’s hard to compete with Sprinkles Cupcakes.
So, what did we learn from this baking experience? Sweet and salty are pretty damn good together. Make sure you serve your dessert before the Sprinkles Cupcakes arrive. And don’t eat three courses worth of dessert in one day or you’ll feel really sick. No matter whose birthday it is.

It’s Okay to Go a Little Overboard Sometimes

Standard

I’ve always felt that brunch is not a meal to take lightly – both literally and figuratively. If it is supposed to combine two meals into one, it should be the size of two meals…right?

The British, unfortunately, do not agree with me. When I was abroad in London, I had an unfortunate experience at a trendy brunch spot in which I ordered “pancakes” for £12 only to find “pancake.” I was not happy with the singular nor was I particularly ecstatic with the thin, crepe-like thing on my plate.

Needless to say, I take brunch pretty seriously. And when I’m hungry, I like to take things into my own hands instead of waiting to be fed while I’m about to chew my arm off. Don’t cross me before I’ve eaten.

This past weekend was pretty much a brunch extravaganza. It all started on Saturday morning. With a bit of planning in advance, plus waking up all refreshed (read: not hungover), I was good to go. On the menu:

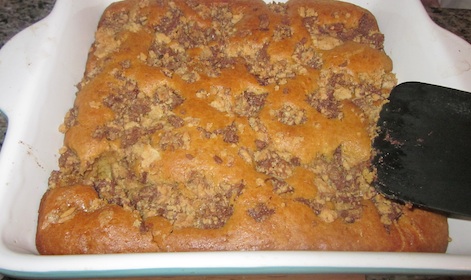
  • Peanut Butter Chocolate Chip Coffee Cake (yes, that is a breakfast item)
  • Baked French toast with Caramelized Apples
  • Breakfast Potatoes with Mushrooms
  • Bacon
Yes, you read that one right. I am a good friend, and I will cook unkosher meat for only the very special people in my life. Sarah would probably say that it didn’t compare to Wando’s, but I won’t take offense.
Peanut Butter Chocolate Chip Coffee Cake
Recipe from the Food Librarian
Topping:
  • 1/2 cup brown sugar
  • 1/2 cup flour
  • 1/4 cup peanut butter
  • 2 Tbsp. butter, melted
  • About 1 cup chocolate chips
Cake:
  • 1/2 cup peanut butter
  • 1/4 cup butter, softened
  • 1 cup brown sugar
  • 2 eggs
  • 2 cups flour
  • 2 tsp. baking powder
  • 1/2 tsp. salt
  • 1/2 tsp. baking soda
  • 1 cup milk
  1. Preheat oven to 375 degrees F. Mix topping ingredients and set aside. Note: if you don’t wait for butter to cool, chocolate will melt. That’s okay.
  2. Beat together peanut butter and butter until fluffy.
  3. Add brown sugar. Then in beat eggs on a medium speed one at a time.
  4. Alternately add in dry ingredients. Then, incorporate the milk.
  5. Pour batter into greased 9X9 pan. Sprinkle topping over the batter.
  6. Bake for about 30 minutes. Enjoy!
All in all, I’d it was enough food for 12 hungry antelopes. Or, like a lot of people. Then, Saturday was a brunch to impress. I was home with my family and was in the mood to make a ridiculous amount of food. And that I did. The menu:
  • Vanilla-Peach Crepes
  • Strawberry Oat Bars
  • Baked Apple Pancake
Oh, yes. It was just as good as it sounds…
And as good as it looks.
As usual, the star of the meal was the famous Baked Apple Pancake. If you’ve ever ordered this from Walker Bros. Pancake House, you’ll know what I’m talking about. This is no ordinary pancake. It’s really like a souffle. Sweet, caramelized apples baked into a pancake of fluffy goodness. If you don’t like it, we can’t be friends.
Oh, small problem…this recipe is TOP secret. I don’t know if I trust you enough to share it right now (and I may have accidentally deleted it from my email). So I’ll have to share it with you another time. To hold you over, just feast your eyes on this…
Hungry yet?

Moving Out (Plus the Best Molten Chocolate Cake)

Standard

In case you haven’t heard (or guessed by my clever title)…I’m moving! Yes, the day has finally come.

I found an apartment a few weeks ago with my friend from work, Missy, whom I’m sure will be featured in many future blog posts, and we’re moving this weekend. Are we packed and all set to go? Um…sure!

It has been pretty hectic around my house, and I’ve had a ton on my plate – both literally and figuratively, since I am a hungry ginger, after all. One of them (the figurative one) was to check out Make It Your Own by cookbook author Jamie Miller. The connection is a long story, and all you really need to know is blah, blah, blah she sent me her cookbook to try out her recipes. The book looked great, so I agreed to do it.

Her book basically focuses on using different sauces for a variety of dishes to make each one your own…hence, the title. If you always find yourself making the same chicken recipe, for example, and are looking to spice things up, this book is for you. The only problem is that you need some unique ingredients for most of these recipes – ones that I don’t usually have in my pantry. I wanted to make the gruyere stuffed salmon burgers with maple-mustard glaze. Maybe next time after I go grocery shopping.

I settled on the Provençal grilled lamb chops minus the recommended aioli. I don’t even eat lamb! It was a tight pantry. The recipe was super easy – and according to my dad, it was flavorful and perfectly seasoned.

This is what happens when you take pictures on your camera phone.


Provencal Herb Paste
Recipe by Jamie Miller

2 tbsp extra virgin olive oil
1 tbsp minced fresh rosemary (I used dried)
3/4 tbsp minced fresh thyme (ditto)
1/2 tbsp minced fresh tarragon
1/2 tsp minced fresh garlic (out of the jar in my fridge)
1/4 tsp chopped dried lavender buds  (I omitted)

Because I’m a last-minute kind of gal, I spread this paste on the lamb chop and let it sit for 10 minutes instead of the recommended 2-4 hours. I think we made it out okay. The lamb chop wasn’t such a great quality, as you can see, but this was an easy recipe in a book for a serious cook.

I had to scrape together something else for this meal, and I had the perfect go to recipe that calls for just 5 ingredients. It is a crowd favorite, and I would really recommend making it because it’s extremely easy – and impressive, if I do say so myself.


Molten Chocolate Cake

Adapted from the Food Network

3 oz. butter
3.5 oz chocolate
2 egg yolks (Save the whites. You’ll thank me later.)
2 eggs
1 cup powdered sugar
1/3 cup flour

  1. Spray four ramekins** with Pam. Preheat your oven to 450 degrees F.
  2. Melt chocolate and butter together. I’d recommend a double boiler, so you don’t burn the chocolate. To create a makeshift one, just boil a pot of water and place a glass bowl with the chocolate and butter over the top, stirring carefully as they melt. Unless your butter is frozen, put the chocolate in first because it will take longer.
  3. In a separate bowl, whisk yolks and eggs together.
  4. Mix in powdered sugar and then flour.
  5. Let the melted butter and chocolate cool for a few minutes. Very slowly incorporate it into the egg mixture. I say slowly because if you aren’t slow enough you can boil your eggs. True story.
  6. Fill your ramekins 3/4 of the way full. Bake for about 6 minutes. If you add on time because of your oven, just add a minute or two because these are very delicate cakes.
  7. Top with powdered sugar and serve.

**Note: If you don’t have ramekins, you can use large muffin tins. Just be sure to watch them very carefully. You can pop them out after letting them cool for a bit.

Amazing. And yes, it tastes as good as it looks.

Eat as directed: straight out of the oven, with a spoon for the molten center, preferably with ice cream if you have some (not all of us are so lucky). Think I’m bringing those ramekins to my new apartment on Saturday? You’d better believe it.

Snowpocalypse ’11 and Ginger Chocolate Chunk Scones

Standard

It’s very possible that the world is ending. It snowed. A lot. It took me over two hours to get home from work. And I have limited ingredients in my pantry. These are all very worrisome things that have happened in the last 24 hours, but I made it through.

This morning I woke up, entirely snowed in with no chance of making it into the office. In case you don’t know what it looks like to be snowed in…here it is:

Love it.

In memorial of the Madison   from last year (which started with me driving through it, led to a fish bowl at Wando’s, numerous snow balls thrown at roommates, a sleepover and a really great apple pancake for breakfast), I decided to make some quick scones before I began my work for the day.

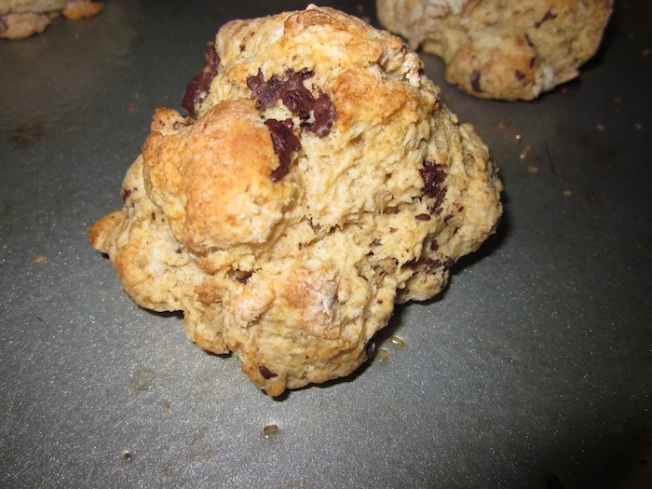
Since I am the Ginger Foodie, I thought it was only appropriate to make some ginger scones. They were really good, and not nearly as bright as my hair.

(Almost) Vegan Ginger Chocolate Chunk Scones
Adapted from Post Punk Kitchen

3 cups flour (I substituted in some whole wheat flour for good measure…pun intended)
2 tablespoons baking powder
1 1/2 tablespoons ground ginger
1/2 teaspoon cinnamon
a pinch of allspice and nutmeg
1/2 cup turbinado sugar, plus extra for sprinkling (I didn’t have enough so I used 1/2 brown sugar)
1/2 teaspoon salt
1/3 cup vegetable oil
1 1/4 cups non-dairy milk (oops, I used regular milk)
1 teaspoon pure vanilla extract
About 5 ounces chocolate, or however much you want to use

1. Pre-heat oven to 400 degrees. Mix together dry ingredients first.

2. Incorporate the wet ingredients until well mixed

3. Chop chocolate with a knife into small, bite sized pieces. I recommend making chocolate chunks so you have shards of chocolate along with bigger pieces. Mix into batter.

4. Spray cookie sheets with Pam. Roll dough into small rounds, a bit larger than your average cookie size.

5. Bake for about 15 minutes, or until lightly browned on top.

Yeah, they were that good. And the ginger made them that much better. I’m bringing the leftovers in to my office tomorrow. If I make it there. And if I don’t eat them all first. Let’s just hope all this shoveling helped…

This post is dedicated to my friend Sarah Jones, who inspired me to write this (and is fully aware of my baking problem). And shoutout to her dog, Sasha Fierce, who also fiercely likes my ginger mane.

It’s Never Too Late for Easy Dark Chocolate Shortbread

Standard

Some things in life are just too easy. Peanut butter and chocolate covered pretzels. Getting your mom to help you late-night bake. Baking delicious holiday-themed shortbread. Making your co-workers happy with food. Okay, some things are just too easy for me, I guess. Things that are not too easy? Writing on your blog. But even though I haven’t written in awhile, this recipe is definitely not outdated. Do you like delicious things? I thought so. Keep reading.

During holiday time I needed the perfect present for my co-workers, and it only took me seconds to decide on a mini bag of treats for each of them. I was a little over-ambitious at first, hoping to include homemade truffles, fudge and caramel popcorn. Maybe next year, guys. I ended up making chocolate bark with an Oreo topping, peanut butter and chocolate covered pretzels and, of course, peppermint dark chocolate shortbread. No, I am not a Keebler Elf as my boss hypothesized. But it did take awhile to make all of this. The easiest part? The shortbread of course.

Dark Chocolate Peppermint Shortbread
Adapted from Tea and Limpets

2 sticks butter, softened
2 cups all-purpose flour
1 cup brown sugar
1 egg
2 tsp. vanilla
About 3 crushed peppermint candy canes
2 cups dark chocolate chips or chopped chocolate **

**The key to this shortbread is using really good quality chocolate. I recommend buying the large bars from Trader Joe’s or investing in some Ghirardelli chips.

1. Cream together butter and sugar

2. Add in vanilla and egg until fully mixed.

3. Mix in flour until incorporated.

4. Preheat oven to 350 degrees F. Line baking sheet with parchment paper. Spread cookie dough onto baking sheet. Bake for 10-15 minutes, or until lightly golden brown.

5. Leave the oven on and immediately spread the chocolate chunks on top. Put back in the oven until a few minutes until just melted.

6. Remove from oven and spread chocolate with spatula. Top right away with broken candy cane pieces.

7. Allow to thoroughly cool. Then, use a pizza cutter to break into pieces. Note: this delicious shortbread tastes better refrigerated.

You can top them with sea salt, nuts, other candy…just about anything. Needless to say it was a huge success. So much so that I made them again as a holiday gift for a friend (hey, hungry, hungry hipster). I also had to prepare an item for our potluck at work. And I tried my very best to outdo everyone else. It ended up pretty well I think from the responses I got.

Pumpkin and chocolate swirl cheesecake bars with Oreo crust. Really, really good. Really good. Thanks Martha.

And so, I dedicate this post to the one and only Charlene Schuman, the real Keebler Elf, without whom I probably would have been able to make all this but wouldn’t have had a kitchen to bake it in. Or ingredients. Or baking tools. It’s a long list – basically she’s pretty cool.

The Best Cookies. Ever.

Standard

Waiting this long to write another blogpost has to warrant something good. Really good. And these English toffee cookies definitely have “The Best Thing I Ever Ate” potential.

So what have I been so busy doing, aside from making amazing cookies? I just got a freelance job writing food and dining reviews for AOL City’s Best in Chicago. My first piece – the best hidden sweet treats (obviously I came up with that one myself). Be on the lookout for the launch of the Chicago site sometime soon.

I don’t think I’ve ever made just regular cookies unless they have some element to make them extraordinary. And I knew right when I saw it that the English toffee from The Bent Fork would make my cookies extraordinary. The crunchy nuts, sweet chocolate and salty-sweet toffee gives the cookies an incredibly addictive aspect that’s just…Wow.

They’re so good, you’ll want to lick the bowl. And that’s not just an expression. I really did. I may have eaten two whole cookies worth of raw cookie dough. I don’t regret it at all. And I didn’t get salmonella either, Mom.

English Toffee Cookies
Adapted from Smitten Kitchen

2 cups all-purpose flour
1/2 teaspoon baking soda
1/2 teaspoon salt
3/4 cup unsalted butter, melted
1 cup brown sugar
1/2 cup granulated sugar
1 tablespoon vanilla extract, or a bit more if you’re feeling generous
1 egg
1 egg yolk
As much fresh English toffee as you can find

Check out the toffee chunk in that cookie. Good one.

  1. Preheat the oven to 325 degrees F and spray cookie sheets. You’ll need extra cookie sheets because these cookies spread a lot when baking.
  2. Combine flour, baking soda and salt. In a separate bowl, mix together melted butter and sugars.
  3. Pour the vanilla and eggs into liquid combination.
  4. Pour dry mixture in, and mix just until combined.
  5. Crush about half of your toffee with a mallet in a sealed bag. Crumble the other half by hand, breaking it into small chunks. Gently mix toffee into cookie dough.
  6. Refrigerate dough before baking. This will prevent the edges from burning. Then drop spoonfuls of dough on to cookie sheet.
  7. Only after you’ve already formed the cookies, use a spoon (or your hands) to eat the leftover dough in the bowl. If you do this before #6, you risk eating all of the dough before it’s baked. Good for you, not so much if you are making the cookies for someone else.
  8. Bake for about 15 minutes, or until slightly golden around the edges.

It’s a Piece of Cake

Standard

It was an epic week. I got a new phone (necessary). And since I received my first paycheck, it was time. To buy my camera, of course! After hearing my friends had forbidden me from taking photos, I knew I had to buy my new camera before my trip to Madison last weekend.

Problem: the only time I had to get the camera was when my parents were celebrating their anniversary. So I did the natural thing and baked an anniversary surprise for them. And took some solid pictures of it (see below). I strolled into Best Buy on a mission. Canon. Point and Shoot. Silver. Done. It was both the fastest and the best purchase I’ve ever made. The guy from Best Buy thought I was crazy, but Best Buy Guy–I don’t care. I got my camera. And proceeded to get my buttermilk, butter and eggs all in a matter of about ten minutes.

On to the cake. My dad has simple tastes. “Feed the masses,” he says. No thanks. But since it was his special day, I decided to comply as much as possible.

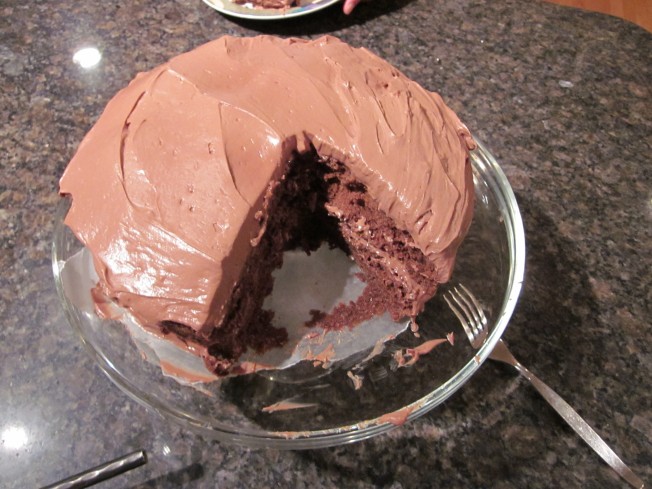
Double Layer Buttermilk Chocolate Cake with Chocolate Cream Cheese Frosting

Recipe adapted from Donna Hay

Well, I said I tried, right? This cake was surprisingly easy, m.o.i.s.t and even my dad liked it.

  • 1 cup  water
  • 1 stick butter
  • ⅓ cup cocoa, sifted
  • 2 cups all-purpose flour
  • 1 tsp baking soda
  • 2 cups granulated sugar
  • 2 eggs, room temperature
  • ½ cup buttermilk (See my post on Chocolate Hazelnut Mousse Layer Cake for how to make buttermilk if you don’t have any)
  • 1 tsp vanilla

1. Preheat oven to 325 degrees F. Place the butter, cocoa powder and water in a saucepan, and stir over medium heat until melted.

2. Mix together flour, baking soda and sugar in a medium bowl. Stir in butter mixture.

3. Add the eggs, buttermilk and vanilla.

4. Spray 2 9-inch round pans, and divide mixture between the two. **Knock the pans on the counter to get rid of the bubbles before baking. Trust me, it works.

5. Bake for about 40 minutes, or until fully cooked through. When done, allow to cool in the pan for 10-15 minutes before removing.

Chocolate Cream Cheese Frosting

  • 1 stick butter, softened
  • 14 oz. cream cheese (I eyeballed this. I also used some fat-free cream cheese mixed with regular, and it still tasted amazing)
  • 2 cups powdered sugar
  • 1/2 cup cocoa

1. Using an electric mixer (it’s a must), beat butter and cream cheese until fluffy (about 6 minutes).

2. Mix in the cocoa powder and powdered sugar–be sure to actually hand mix these in first so you don’t have powder flying everywhere. Beat for an additional 6 minutes.

3. If you finish the frosting before the cake is done, do not refrigerate. It will harden and be difficult to spread. Let it sit in a cool place.

Once the cake has slightly cooled, frost one layer. Then, put another layer on top and frost it. Put on a pretty cake pedestal like so:

Look at that camera quality.

Looks like a piece of cake, right? Well…even baking veterans make mistakes sometimes. I had the batter in the pans, then the  pans in the oven. It was all too easy. I started to clean up when I noticed a little something peeking out from my grocery bag. The BUTTERMILK! The one special ingredient to make my cake extra-moist and delicious wasn’t even in the cake. I FORGOT the buttermilk in my buttermilk chocolate cake. Very smooth.

I pulled the pans out of the oven as fast as possible. This will be fine. I’ll just pour the buttermilk evenly in the pans and throw them back in the oven, I told myself.

Don’t do that. Obviously when you mix liquid around in a pan (including the non-stick spray), the pan is no longer non-stick. When you’ve realized you messed up, sometimes you just have to admit defeat. I poured all of the batter back into the bowl (which I had already washed), washed out my pans, remixed the batter and poured it back into newly sprayed pans. Phew, that was a close one.

So I told my parents they could finally come downstairs, and within about 2 minutes we were here…

Oh, yes. It was good.

And then we we’re here…

Action shot. My mom likes to save cake, in case you didn’t know
(my 16th birthday cake is somewhere in the freezer–for sure inedible).

The cake: a success (in the end). The camera: major success (umm can’t you tell from these luscious photos?). My stomach: turning from eating hot cake. Ouch. But was it worth it? Totally.

Birthday Surprises and Chocolate Hazelnut Mousse Layer Cake

Standard

My friends know that when there is a birthday coming up (and there usually is) to expect some sort of birthday treat. I’ve made everything from espresso blondies (maya’s favorite) to spinach artichoke dip (don’t ask…some weird people don’t like sweets). A few weeks ago I decided to tackle something new for my friend Abby’s birthday: a double layer cake. This wasn’t just any double layer cake. It was a chocolate cake with a Nutella espresso mousse.

Chocolate Cake

The best part? I lied. Okay, lying is not good. But in the name of a birthday surprise it is a very good thing. Abby knew I was baking something, but I wanted to save it for her surprise party. So I told her it wouldn’t be ready, and then when she showed up she was shocked to see a beautiful–if I do say so myself–chocolatey birthday cake.

Chocolate Hazelnut Mousse Layer Cake

Original Recipe from Erica’s Sweet Tooth

I wasn’t quite as ambitious as the original recipe so I decided to bake only two layers instead of splitting them in half after baking.

1-3/4 cups all purpose flour

2 cups sugar

3/4 cups cocoa powder

2 tsp baking soda

1 tsp baking powder

1 tsp salt

1 cup buttermilk (note: if you don’t have buttermilk, substitute with sour cream or milk with a few teaspoons of lemon juice)

1/2 cup vegetable oil

2 large eggs

1 tsp vanilla extract

1 cup freshly brewed hot coffee

1) Preheat oven to 350 degrees.

2) Combine flour, sugar, baking soda and powder, salt and cocoa and mix together.

3) In a separate bowl combine the eggs, oil, buttermilk and vanilla.

4) Add the wet ingredients to the dry, preferably with a mixer on low.

5) Stir in the coffee.

6) Pour mixture into two 8″ pans or two different size pans in my case. It all works out–just be sure to adjust cooking time depending on cake thickness. Bake for 35-40 minutes depending on your oven.

Important: allow to cool for at least 30 minutes before removing the cake from the pan. Otherwise you’ll lose part of the bottom and be forced to eat it. Not pretty. In the event that you do loose a chunk of the cake, don’t stress because the mousse will help even it out.

Hazelnut Mousse and Nutella Coffee Topping

Mousse Adapted from Erica’s Sweet Tooth

*Note: this may not be enough mousse if you decide to do a 4-layer cake.

2 cups or 1 pint heavy whipping cream

3/4 cup Nutella or Hazelnut spread

3 tbsp hot water

3 tsp espresso powder

1) Add the espresso in hot water, mixing until dissolved.

2) Add the Nutella, beating until reaching a smooth consistency.

3) With a mixer (definitely necessary) whip the cream until stiff peaks form. To test for peaks, stop the mixer when the cream begins to get firm and pull the beater gently upwards. If the cream pulls out of the bowl with the beater and doesn’t immediately fall, you’ve got peaks!

4) Gently fold the Nutella mixture into the whipped cream.

It is much easier to put any type of frosting on a cake that isn’t crumbly. Solution: freeze the cakes briefly before mousse-ing them. Otherwise wait until they are thoroughly cooled or the mousse will melt. Put a thick layer of mousse between the two layers and a thick layer on top as well. I decided to do the sides as well, but you can use your artistic vision here.

For the garnish on top, combine about 2 tbsp of Nutella (what you’ll have leftover) and some leftover coffee. Spoon a small amount of coffee into the Nutella until it is thin enough to drizzle but not watery. Then drizzle on top of the cake and down the sides. Finish off with semi or bittersweet chocolate shavings if desired.

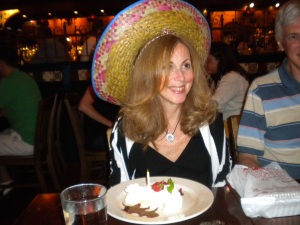
On the topic of birthday surprises, happy birthday Mom! I surprised her this weekend by coming home–with homemade granola bars in tow (recipe for those coming soon). I had to promise not to put these photos “on the Internet,” but I’m pretty sure that was a euphemism for Facebook so I think I’m safe. Besides, who knew she looked so glamorous in a sombrero?

Mom in Sombrero